How to develop an AR copy paste app from scratch

Sokaribo is a software developer and technical researcher with a strong commitment to leveraging technology to optimize operations and drive positive change.
So I decided to try out this cool project: an Augmented Reality (AR) copy-paste app.
The app combines Augmented Reality and Machine Learning to find distinct objects in the surroundings, then copies, trims, and pastes the object in an image editing software on your computer automatically.
This article explains how to develop the AR app yourself.
Table of Content
- AR Copy Paste
- Understanding the process
- Prerequisites
- Downloading and setting up relevant packages
- Setting up a local server on your laptop
- Setting up your mobile phone
- Setting up the app
- Congratulations
Introduction
The demand for AR applications has seen tremendous growth over the last couple of years and is still rising. This demand is a result of the way AR can interpret, manipulate, and enhance the view of the real world.
AR stands for Augmented Reality and refers to an interactive 3D experience that combines the view of the real physical world with computer-generated elements in real-time.
The AR Copy Paste app is a project that enables you to digitalize real-world objects around us. The app combines Augmented Reality and Machine Learning to find distinct objects in the surroundings, then copies, trims (removing the background automatically, and keeping the object only), and pastes the object in an image editing software on your computer directly.
The app, which is a cool beginner's AR project, makes the job of creatives easier, as they are now able to point their phone camera at an object and copy-paste it onto their computer almost automatically.
Understanding the Process
AR Copy Paste is made possible by a combination of Augmented Reality, Machine Learning, and open-source technologies such as the Boundary-Aware Salient Object Detection (BASNet) and Scale Invariant Feature Transform (SIFT).
BASNet makes it possible to accurately identify people and objects in the real world and remove the background surrounding the object automatically. While SIFT matches the coordinates on the phone with the computer screen, enabling you to place the digital captures of the object in specific positions on your computer screen.
The AR Copy Paste can be used on Android or iOS mobile phones with a variety of image editing computer applications such as PowerPoint. The entire process of developing the AR Copy Paste app is done through three (3) independent modules, which include:
- Local Server setup
- External salient object detection service setup
- Mobile App setup
Now that you have a fair understanding of AR and understand the process involved, let us get started on creating an AR Copy Paste App.
Prerequisite
- An Android or iOS mobile device
- Photoshop installed
- A code editor (I'll be using VSCode)
- Basic understanding of command prompt (I'll be using Anaconda Prompt)
Downloading and setting up neccesary packages
Step 1: Connect your mobile device and computer to the same wifi network
Ensure your computer and the mobile device to be used for the project are connected to the same internet.
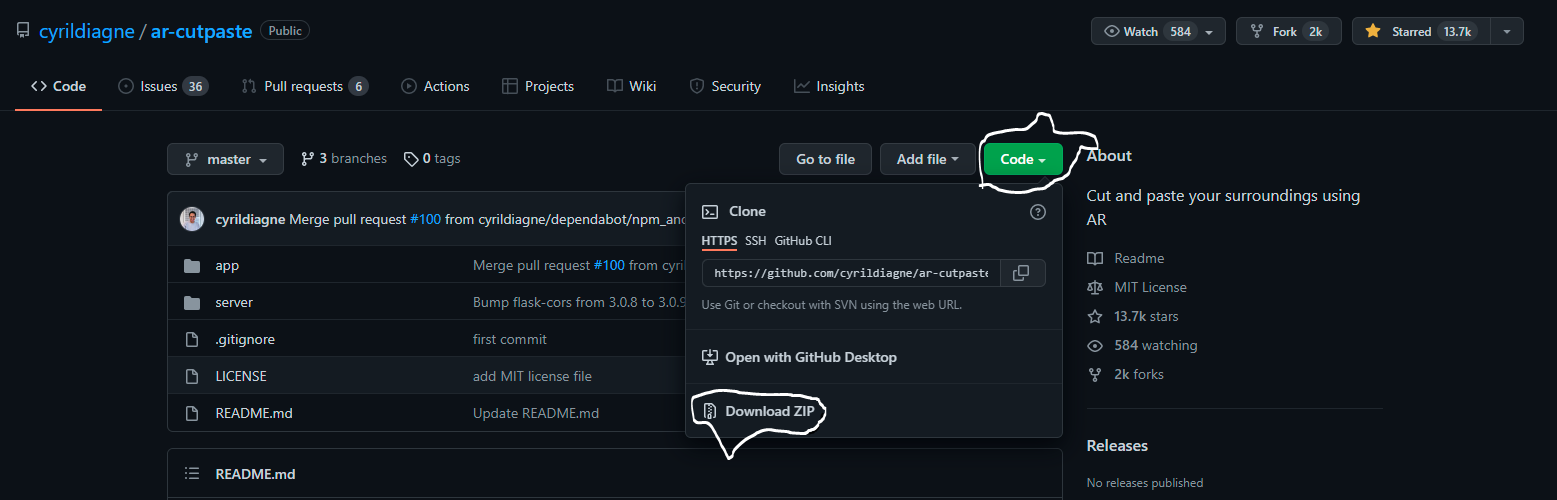
Step 2: Download the AR Copy Paste GitHub files
The GitHub files can be found on https://github.com/cyrildiagne/ar-cutpaste. Clone the repository by clicking on "Code" and "Download Zip". Make sure to unzip the file after downloading it.
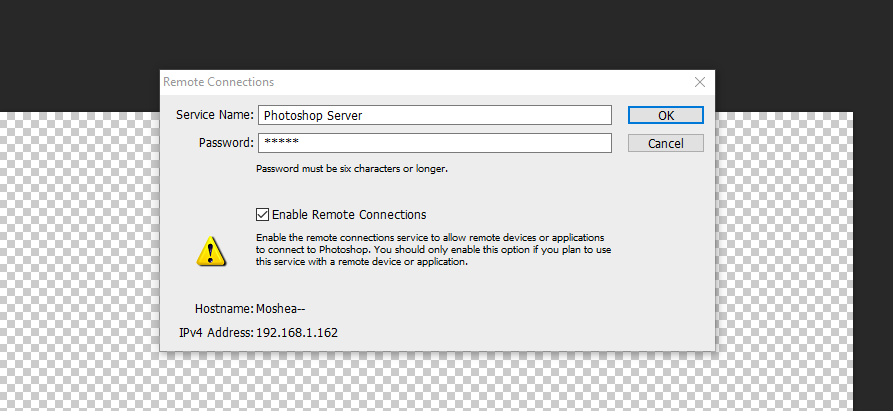
Step 3: Open photshop and enable remote connection
Set the service name to "Photoshop Server" and password to "123456". Also copy out your IP Address.
Note: You can change the server name and password to whatever you want; just remember to use it wherever a server name and password are required.
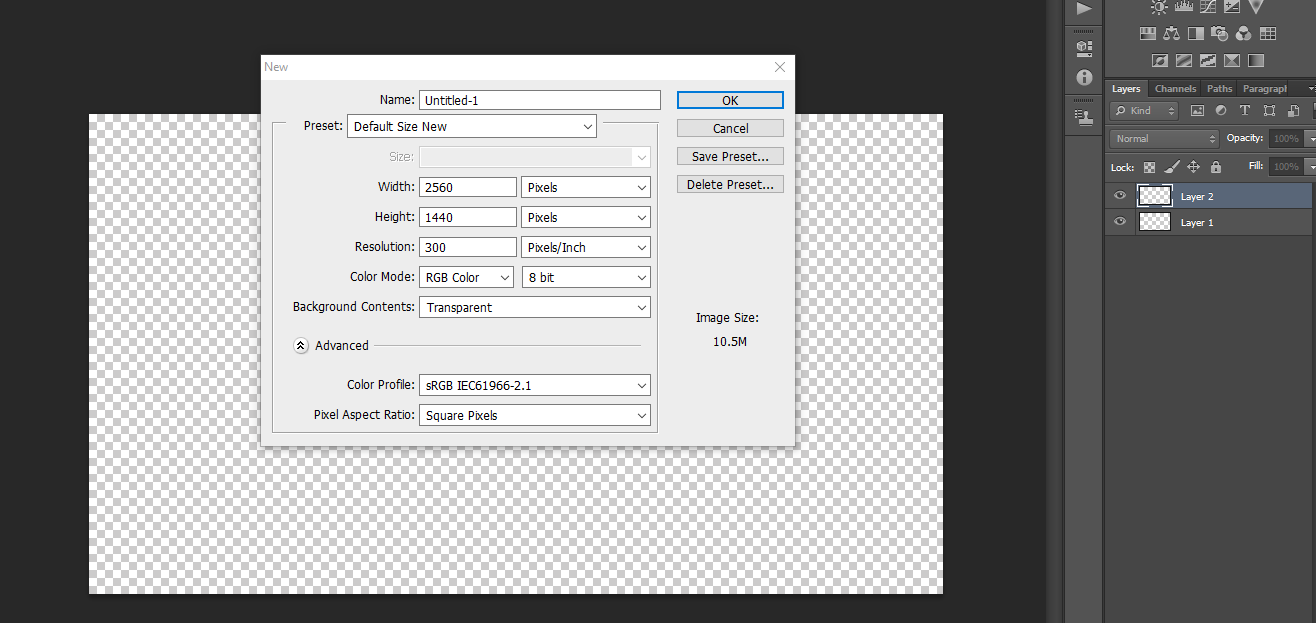
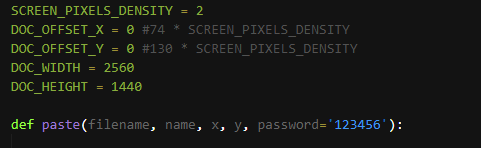
Step 4: Set photoshop canvas size to 2560 by 1440 pixels, 300pixels/inch resolution, and Transparent background, then create another layer
Step 5: Open the downloaded AR-cut-paste GitHub file and navigate to server/src/
Open the "main" file with a code editor and ensure the Photoshop password is correct. Additionally, change the host address to the copied Photoshop IP address.
After editing, save the file and close it.
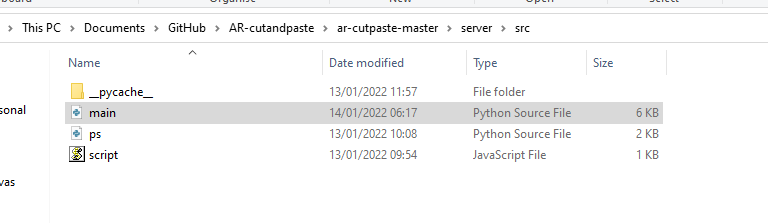


Then open the "ps" file and edit the doc offset to zero (0) on both X and Y. Then edit the password. After editing, save the file and close it.
Setting up the local server
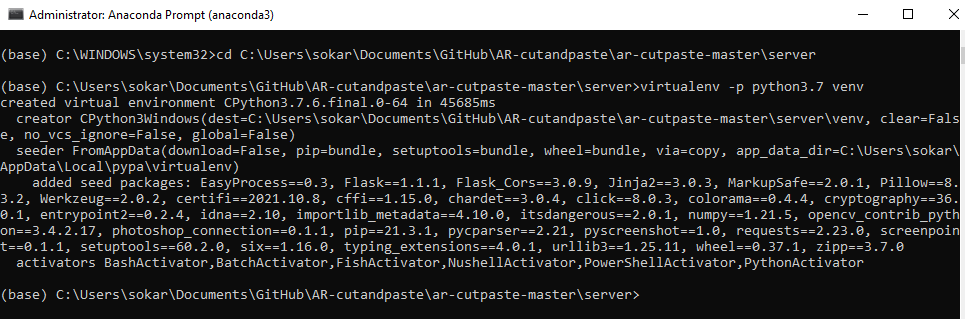
Step 6: Run your command prompt as administrator (I'll be using Anaconda Prompt)
Step 7: Navigate to ar-cutpaste-master/server, copy the destination address and paste into your command prompt
cd C:...\GitHub\AR-cutandpaste\ar-cutpaste-master\server
Step 8: Pip install and run virtualenv
#to install virtualenv
pip install virtualenv

#to run virtualenv
virtualenv -p python3.7 venv
This creates a virtual environment.
Step 9: Activate the environment
navigate to the script folder in the command prompt and activate the environment.
#navigate into the venv folder
cd venv

#navigate into the Scripts folder
cd Scripts

#activate the environment
.\activate
Notice the change in the path in the command prompt
Note: if .\activate does not work, it may mean you need to install Bash

After activating the environment, navigate back to the server
#navigate out of the Scripts folder
cd ..

#navigate out of the venv folder
cd ..

Step 10: After navigating back to the server in the command prompt, pip install -r requirements
#pip install (copy and paste)pip install -r requirements.txt
Step 11: Setup the external salience object detection service
Option 1: Set up your model service (this requires a CUDA GPU)
As mentioned above, for the time being, you must deploy the BASNet model (Qin & al, CVPR 2019) as an external HTTP service using this BASNet-HTTP wrapper (requires a CUDA GPU)
You will need the deployed service URL to configure the local server
Make sure to configure a different port if you're running BASNet on the same computer as the local service.
Option 2: Use a community provided endpoint
A public endpoint has been provided by members of the community. This is useful if you don't have your CUDA GPU or do not want to go through the process of running the service on your own.
Use this endpoint by launching the local server with --basnet_service_ip http://u2net-predictor.tenant-compass.global.coreweave.com
We will be using option 2, hence run the following code in your command prompt
#copy and paste the following code
python src/main.py --basnet_service_ip http://u2net-predictor.tenant-compass...  --photoshop_password 123456
Ensure the Photoshop password matches the one you adopted
Congratulations so far! Your server is now running.

Setting up mobile device
Step 12: Download the expo app from the Android store or iOS store
Download and install the Expo app on your mobile device
Step 13: Download and install node.js on your computer
Download the recommended version
Configure the app on your computer
Step 14: Run another command prompt as administrator and navigate to ar-cutpaste-master/app
Copy the address and paste in the command prompt
cd C:...\GitHub\AR-cutandpaste\ar-cutpaste-master\app
Step 15: Install npm
#copy and paste to install npm
npm install
Step 16: Navigate to ar-cutpaste-master/app/components/ and edit the Server file with your code editor

After editing to your IP address, edit your mask path, then save and close the file.
mask = Image.open('cut_mask.png').convert("L").resize((256,256),resample=Image.BICUBIC, reducing_gap=2.0)

Step 17: Start npm
#copy and paste to start npm
npm start

After starting npm a QR will pop up on your screen.
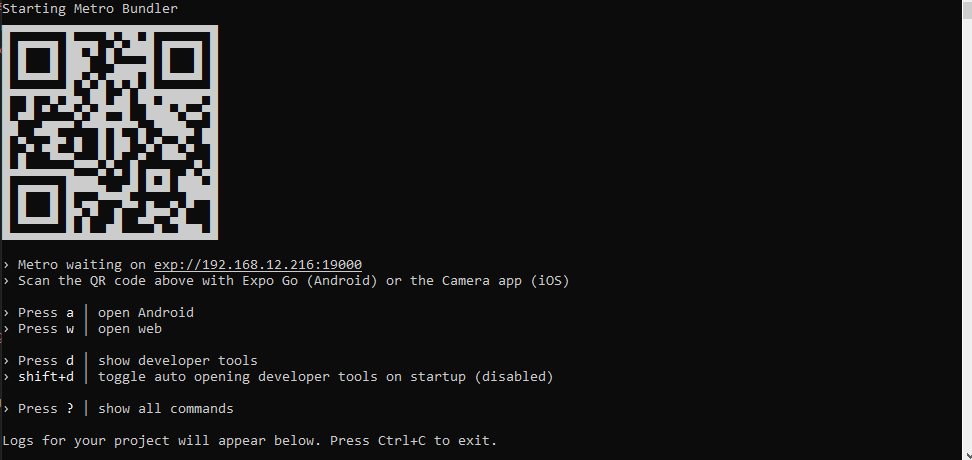
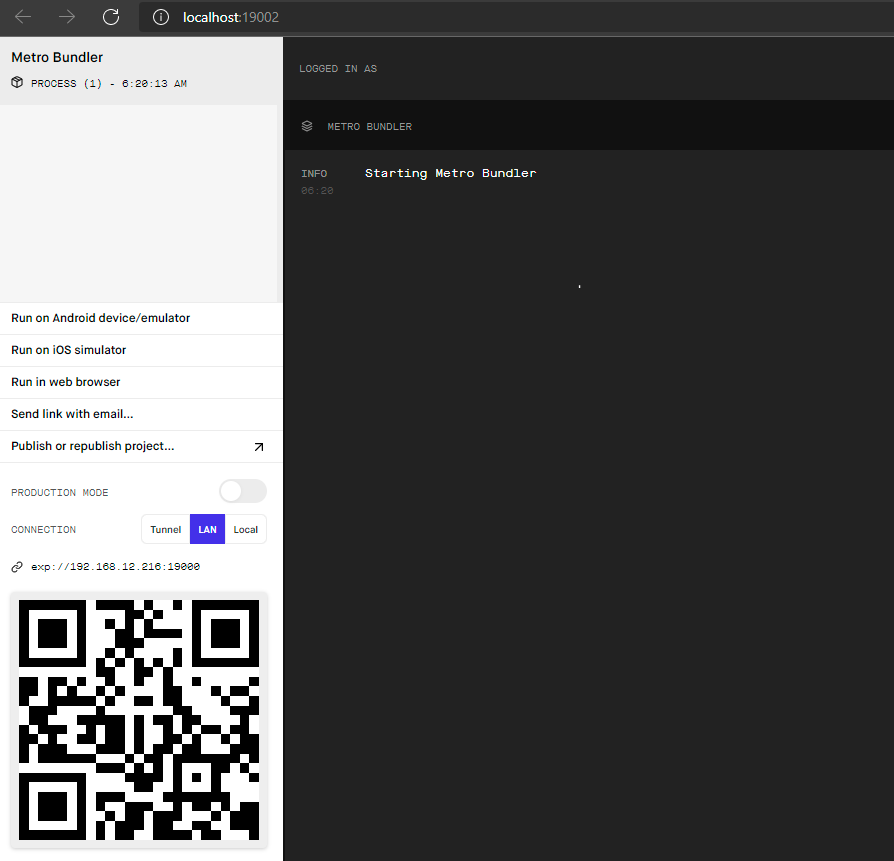
Step 18: Scan QR code with the Expo app on your mobile phone
Hurray! All you have to do now is snap the object you want with your mobile phone and watch it transfer automatically to your computer.
Congratulation!
You have successfully built an AR Copy Paste App.
Phew, that was a lot of things we just covered. In this article, we developed an app that can find distinct objects in the surroundings, then copies, trims, and pastes the object in an image editing software on your computer automatically.
I hope you found this tutorial helpful! I will be sharing other amazing projects and content, so follow to saty updated.


